Hoarding -vs- "DON'T THROW THAT AWAY I MIGHT NEED IT FOR SOMETHING I SAW ON PINTEREST!"
I'm happy to say, my part won. :)
The other day Aaron found a paper towel roll, and asked why I hadn't thrown it away. I simply said, "What if I find a craft or project I need it for?"
To which he replied, with a hint of an eye roll, "A pinerest thing?"
"Yes"
Well guess what! I needed and used that paper towel roll today. So there!!!
I am co-hosting a baby shower for a dear dear childhood friend. Tomorrow. So of course, I had to get everything done
(started) today. All of my ideas originated from
Pinerest, and they were all a success. Albeit, a few mishaps here and there, but it's a learning process.
On the baby shower crafting menu:
* Oreo cookie pops. Original pin found
here.
* Motorcycle baby shower cake. Original pin found
here.

OREO COOKIE POPS - PamStyle
First time making them, so it was a little tricky trying to figure out what is a good technique. I googled and googled, looking for advice/tips/hints. They all helped tremendously. However, once you start doing the deed, it's really just trial and error.
My supplies:
Purchased:
Family sized Double Stuffed Oreo Cookies $3.99
Foam boards $3.99
Wilton Pops Decorating Stand $3.99
Spool of ribbon $1.00
Lollipop sticks $2.49
Candy melts (1 lb) $7.49
Blue sugar $3.49
On Hand At Home:
Double boiler
Shortening
Parchment paper
Spoon
Foil
Scissors
First, I started the double boiler. Fill the bottom pot halfway with water. Bring to boil, set to simmer. Add top pot. Add candy chips. Stir. Pretty simple.
While I waited for the chips to melt, I lined a cookie tray with foil. Then, separated the cookies.
Once the candy chips melted, I dipped the lollipop stick in the candy. Once I dipped the sick, I placed it dead center on the cream side of the cookie. Next, I took the cookie top and pushed it on top of the stick, into the Oreo cream.
I tried sandwiching the cookie with just my hands, and ended up with a broken cookie top.
See below....
Turns out, leaving the bigger part of the cookie (cream sided) on a flat surface - then placing stick centered onto cream - the pushing cookie top over the stick- was the best way to do this. This was keeping the cookies from cracking. It pushed the stick into the cream and spread the melted candy between the cream and cookie.
So..... somewhere between putting cookies together and decorating them, I forgot to take pictures. Or was so involved and messy, my camera was the last thing on my mind. Oops.
Anyhow, once I placed the stick in each cookie, I put them all in the refrigerator for about 10 minutes. I read, on one of the million sites, that this helps the candy adhere and gives you less chance of the cookie sliding off the stick into the melted candy. It's true.
Then the dipping. (All the while, continue stirring the melted candy every so often). So, I tried many different "dipping" techniques. Half cookie.... Whole cookie.... Spoon melted candy over cookie...... They all worked well. The trick is to have the melted candy at the PERFECT consistency. The candy alone melts into a thick glob of grossness. To thin it out, add 1 teaspoon of shortening. (So says the millions of websites). I just cut little pieces, the size of a finger nail, and stirred until I got the consistency I thought was good. More often than not, I was wrong! The correct consistency is when you put a metal spoon (I used the one I was stirring with) in the melted candy and it coats in a pretty (yes, I seriously mean pretty looking) coat. If there is too much shortening, you can see a thin oily layer drip off the spoon. When that happens, just add more candy chips. If the melted candy is too thick, it will make clumps.
After 10 wasted cookies, and not a single one lost into the melted candy, I FINALLY got it down. I wanted to play around with it, so some were fully coated and some only half coated. Once I coated the cookies, I immediately sprinkled the blue sugar onto the hot candy. Then placed it on a cooled cookie sheet covered with parchment paper. When the cookie sheet was full, I put it in the fridge and let the cookies cool for no less than 15 minutes. (The cake pop stand was a complete bust. I'm sure it'll work GREAT for actual cake pops, but not for Oreo pops. That will be tested next week when I make
panda cake pops )
After I cooled all the cookies, I tied a ribbon around the stick & shoved them into a foam rectangle. I decorated the rectangle with the same ribbon used in the Motorcycle diaper "cake". End result......
Viola!
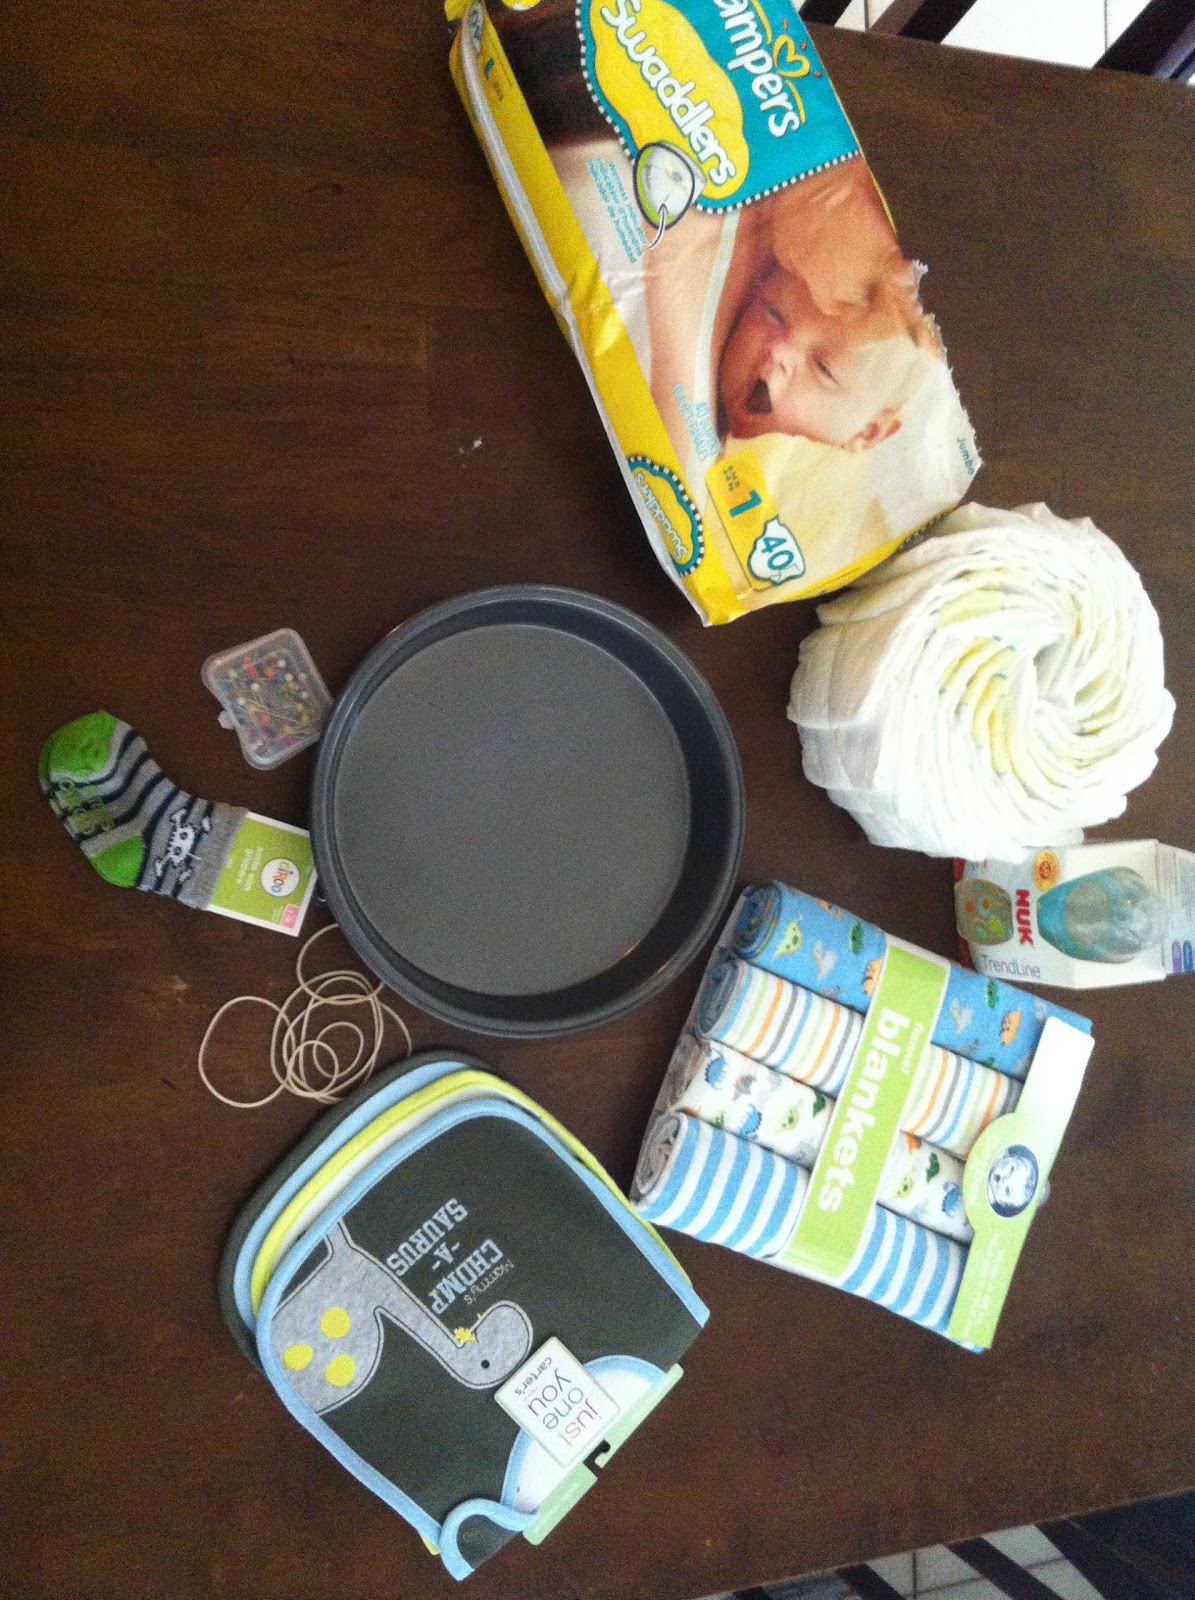
I had left over diapers and receiving blankets, from the other project, so I made a small bouquet for the mom-to-be.
The very first taste tester was an extremely biased 2 year old Momma's boy. He LOVED them so much he shared with his face, hands, and hair. Then Aaron came home, and was the real taste tester. He ate two. :) I'm pretty pleased with the end result. If there are any tips or tricks anyone cares to share, please help a sister out!